Step By Step Drawing A Rose Easy: Your Ultimate Guide To Mastering The Art
Ever wondered how to create stunning rose drawings that look effortless? Well, you’re in the right place! Step by step drawing a rose easy is totally doable, even if you’re just starting out. Whether you want to impress your friends or simply express your creativity, this guide will help you bloom into an artist in no time. So grab your pencil and let’s dive in!
Art has this magical way of connecting us with our inner selves. And roses? They’re like the rockstars of the flower world. Drawing a rose might seem intimidating at first, but trust me, it’s all about breaking it down into bite-sized steps. By the time you’re done reading this, you’ll be sketching roses like a pro.
This article isn’t just another boring how-to guide. It’s packed with tips, tricks, and a sprinkle of fun to make the process enjoyable. So, if you’ve ever dreamed of creating beautiful rose art, keep reading because we’re about to make that dream a reality!
Read also:Holly Flax The Office Unveiling The Hidden Gem Of Dunder Mifflin
Why Drawing Roses is Worth the Effort
Roses are more than just flowers; they’re symbols of love, passion, and beauty. When you learn step by step drawing a rose easy, you’re not just mastering an art form—you’re tapping into something timeless. People have been captivated by roses for centuries, and now it’s your turn to join the club.
Here’s why roses make such great subjects:
- They’re universally loved, making your artwork instantly appealing.
- The intricate details of a rose offer endless opportunities for creativity.
- Once you master roses, other flowers become a piece of cake.
Plus, there’s something therapeutic about drawing roses. It’s like meditating with a pencil in hand. Who knew art could be so good for the soul?
Understanding the Basics of Rose Anatomy
Before we jump into the nitty-gritty of step by step drawing a rose easy, let’s take a moment to appreciate what makes a rose, well, a rose. Understanding the anatomy of a rose will give you a solid foundation for your sketches.
A typical rose consists of:
- Petals: These are the star of the show. They’re layered and overlap to create that iconic bloom.
- Sepals: These are the green leaf-like structures at the base of the flower.
- Stem: The stem provides structure and can add interest with its thorny texture.
- Leaves: Don’t forget the leaves! They’re an important part of the overall composition.
Now that you know what you’re dealing with, let’s move on to the fun part!
Read also:Patrick Mahomes Sr Net Worth A Deep Dive Into The Nfl Legacy
Choosing Your Tools
Having the right tools can make all the difference in your artistic journey. For step by step drawing a rose easy, here’s what you’ll need:
- A good pencil (HB or 2B works great).
- A sharpener because dull pencils are no fun.
- An eraser for those inevitable mistakes.
- Optional: colored pencils or markers if you want to add some color.
Remember, you don’t need fancy supplies to create beautiful art. Sometimes simplicity is key.
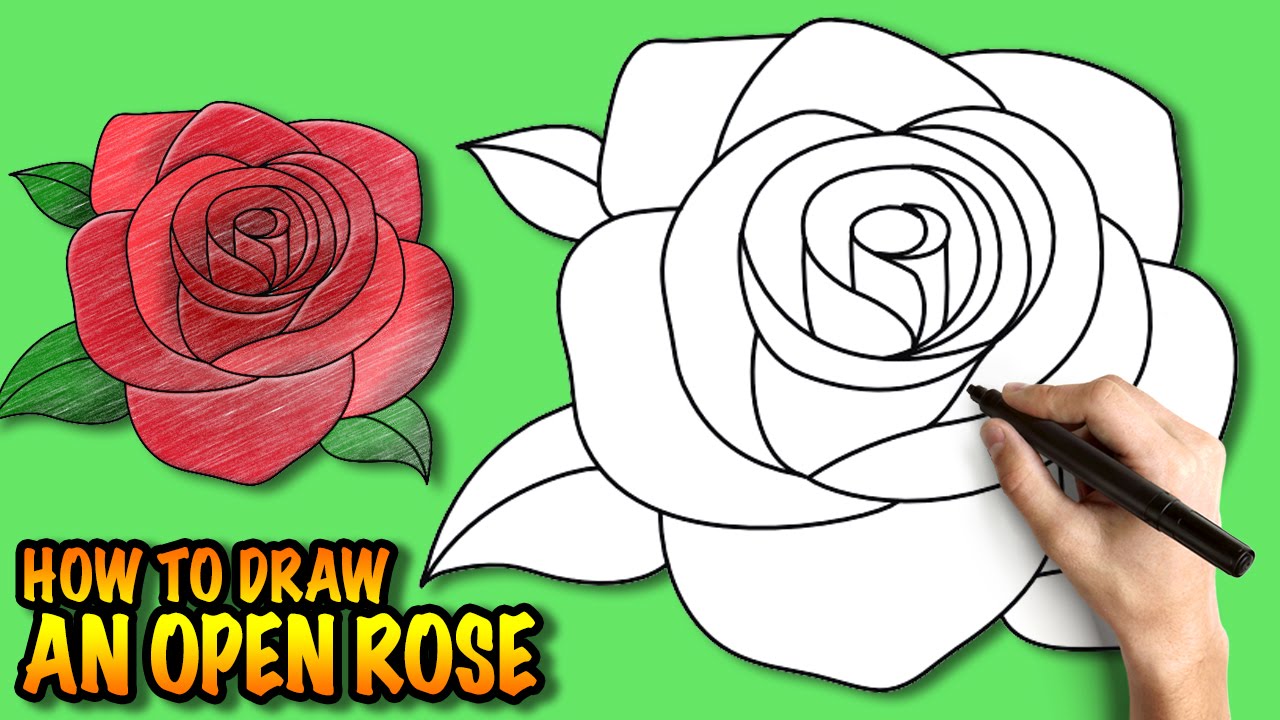
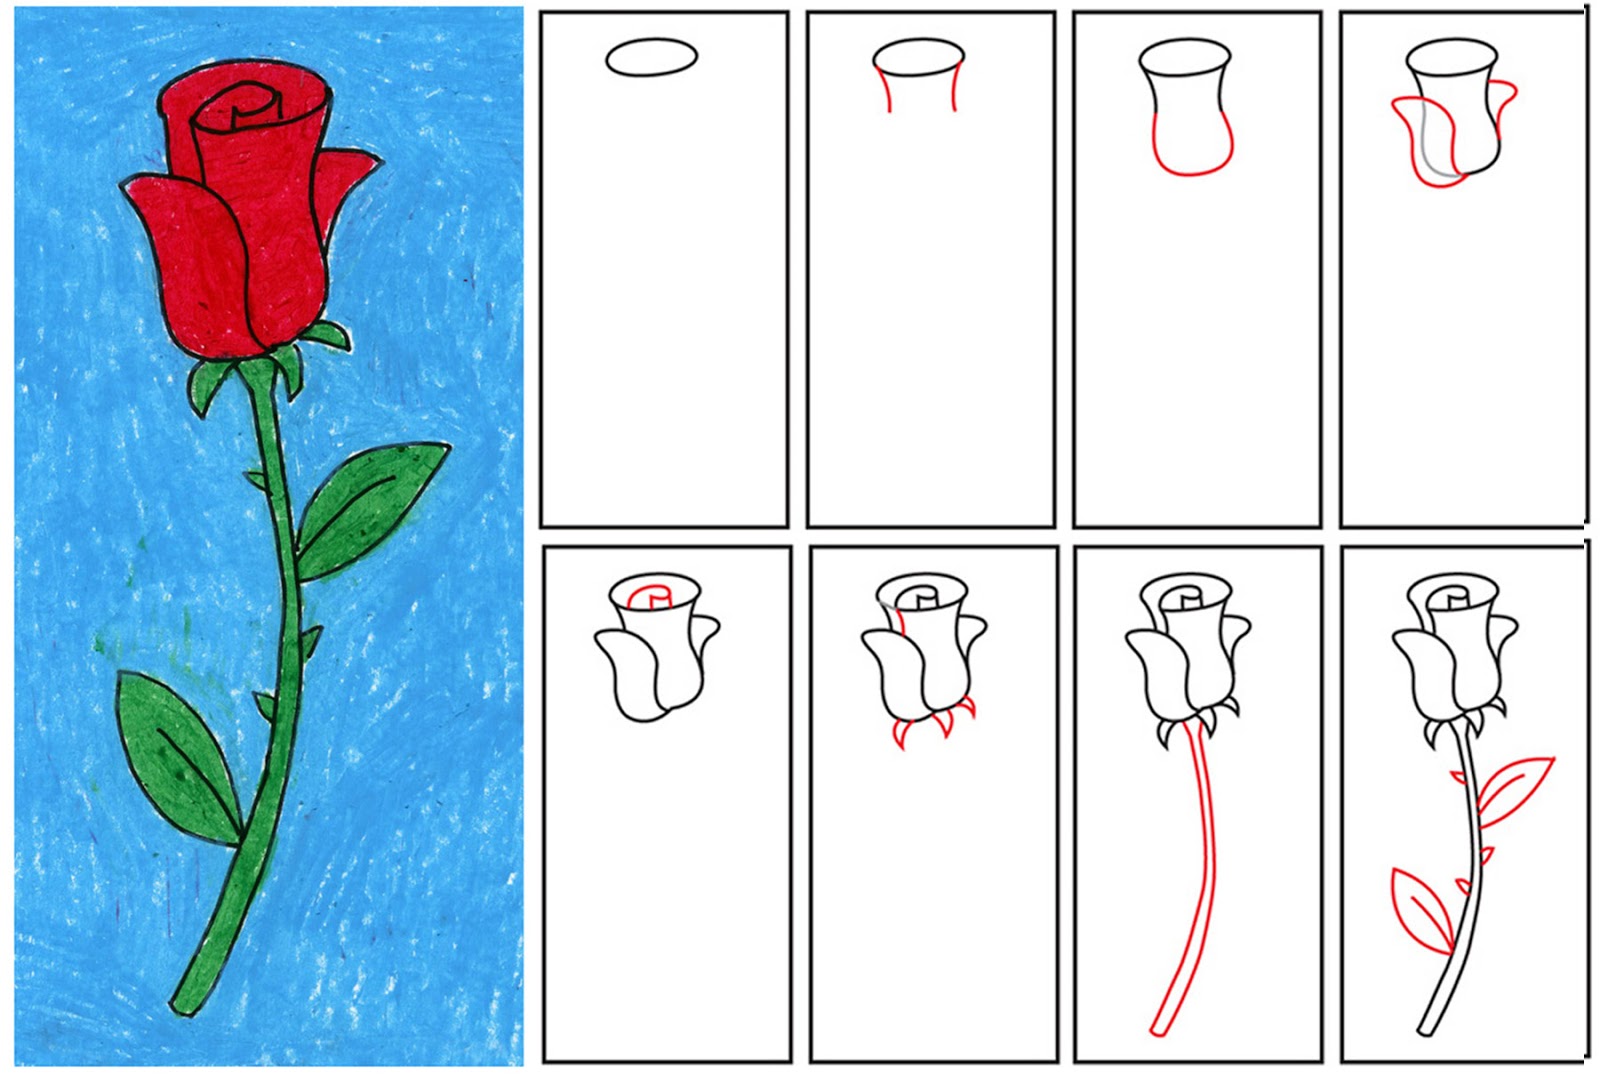
Step by Step Drawing a Rose Easy: The Process Begins
Alright, let’s get down to business. Here’s a detailed breakdown of how to draw a rose step by step:
Step 1: Start with a Basic Circle
Every great rose begins with a humble circle. This will serve as the center of your bloom. Keep it light so you can erase any mistakes later.
Step 2: Add Layers
Roses are all about layers. Draw a slightly larger oval around your circle to represent the inner petals. Then, add another layer of petals around that. Think of it like building a flower from the inside out.
Step 3: Define the Petals
Now it’s time to give your petals some personality. Use gentle curves to shape each petal. Remember, no two petals are exactly alike, so don’t be afraid to mix it up.
Step 4: Sketch the Stem
Your rose needs something to stand on! Draw a long, slightly curved line for the stem. Add some thorns if you want to make it more realistic.
Step 5: Add Leaves
Leaves complete the picture. Use simple shapes to create the leaves, and don’t forget to add some texture with veins. This adds depth to your drawing.
Step 6: Refine Your Sketch
Take a step back and look at your work. Are there any areas that need tweaking? Now’s the time to refine your sketch and make it pop.
Step 7: Shade and Color
If you’re feeling adventurous, add some shading to give your rose dimension. You can also use colored pencils or markers to bring it to life. The choice is yours!
Tips for Perfecting Your Rose Drawings
Here are some pro tips to take your rose drawings to the next level:
- Study real roses: Nothing beats observing the real thing. Take a close look at how the petals overlap and the way light hits the flower.
- Practice makes perfect: Don’t get discouraged if your first few attempts don’t turn out as expected. Keep practicing, and you’ll see improvement in no time.
- Experiment with styles: Try different techniques, such as cross-hatching or stippling, to add texture and interest to your drawings.
Remember, art is all about self-expression. So, don’t be afraid to put your own spin on things!
Common Mistakes to Avoid
Even the best artists make mistakes. Here are a few common pitfalls to watch out for:
- Overworking the petals: Too much detail can make your rose look cluttered. Keep it simple and let the natural beauty shine through.
- Ignoring proportions: Make sure your petals, stem, and leaves are in proportion to each other. Otherwise, your rose might look off-balance.
- Forgetting the background: A well-drawn rose deserves a thoughtful background. Consider adding shading or patterns to enhance the overall composition.
Avoid these mistakes, and you’ll be well on your way to creating stunning rose art.
Inspiration from the Masters
History is full of artists who have captured the essence of roses. From Van Gogh to Monet, these masters have left behind a wealth of inspiration. Studying their work can help you develop your own style.
For example:
- Van Gogh: Known for his bold use of color, Van Gogh’s rose paintings are a feast for the eyes.
- Monet: Monet’s impressionistic approach to roses adds a dreamy quality to his work.
Let these artists inspire you as you embark on your own artistic journey.
Step by Step Drawing a Rose Easy: Resources for Further Learning
Want to take your skills to the next level? Here are some resources to help you grow:
- Online tutorials: YouTube is packed with step-by-step drawing tutorials that can help you improve.
- Art communities: Join online forums or social media groups where artists share tips and feedback.
- Books: There are plenty of books dedicated to flower drawing that can deepen your understanding.
Learning never stops, so keep exploring and expanding your horizons.
Conclusion
And there you have it—your ultimate guide to step by step drawing a rose easy. By breaking the process down into manageable steps, you can create beautiful rose art that’s sure to impress. Remember, practice is key, and don’t be afraid to make mistakes. Every artist has to start somewhere, and you’re already on the right path.
So, what are you waiting for? Grab your pencil and start sketching. And when you’re done, don’t forget to share your masterpiece with the world. Who knows? You might just inspire someone else to pick up a pencil and join you on this artistic adventure.
Table of Contents
Here’s a quick guide to help you navigate through the article:
- Why Drawing Roses is Worth the Effort
- Understanding the Basics of Rose Anatomy
- Choosing Your Tools
- Step by Step Drawing a Rose Easy: The Process Begins
- Tips for Perfecting Your Rose Drawings
- Common Mistakes to Avoid
- Inspiration from the Masters
- Step by Step Drawing a Rose Easy: Resources for Further Learning
- Conclusion
Article Recommendations